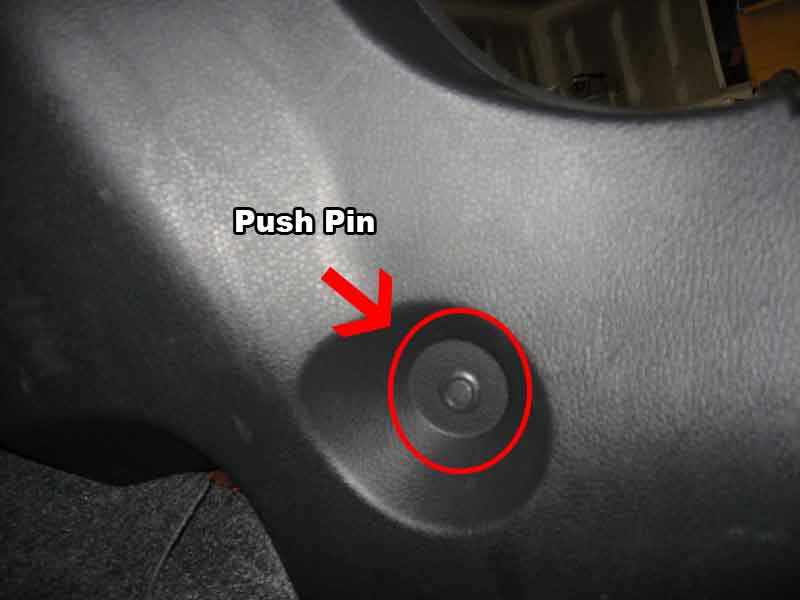
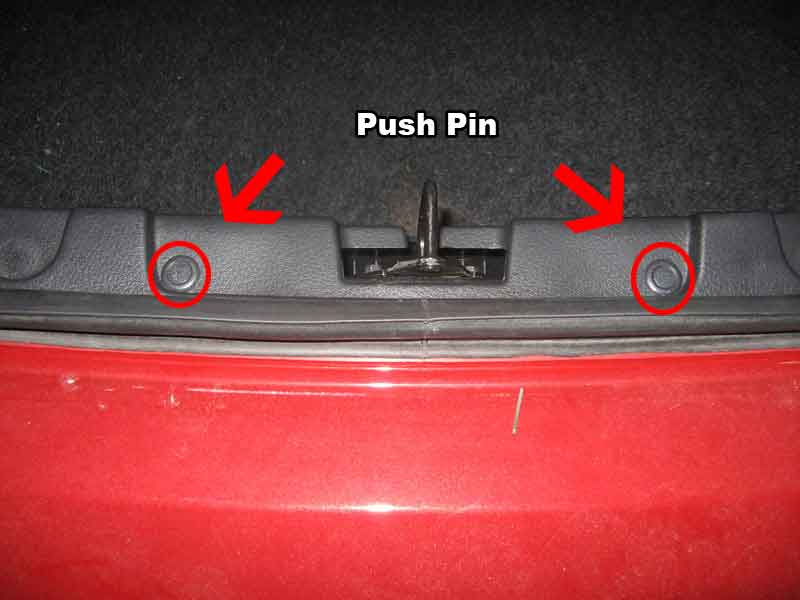
Open your trunk and remove the rear tail light carpet/cover by loosening the 2 thumb screws and removing all 4 push pins. To remove push pins, use your screw driver to pop up the center cap. Then the pin should pull out.
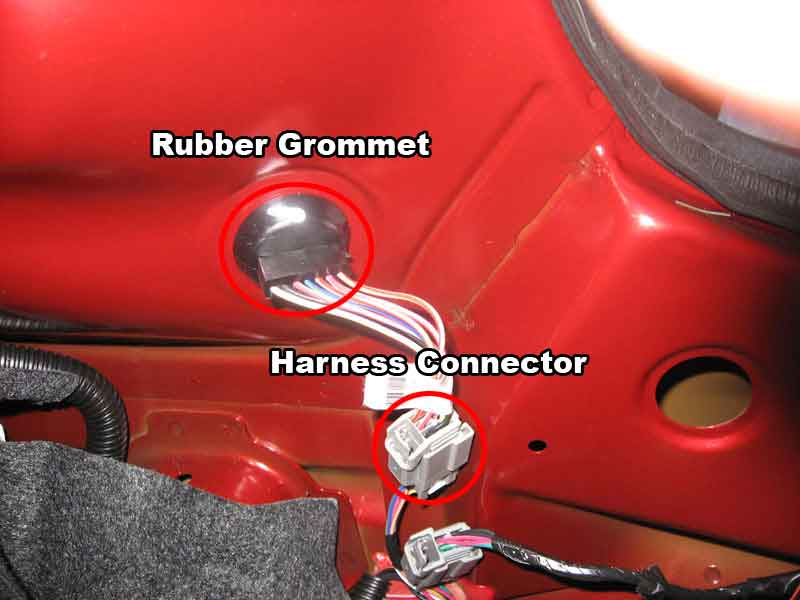
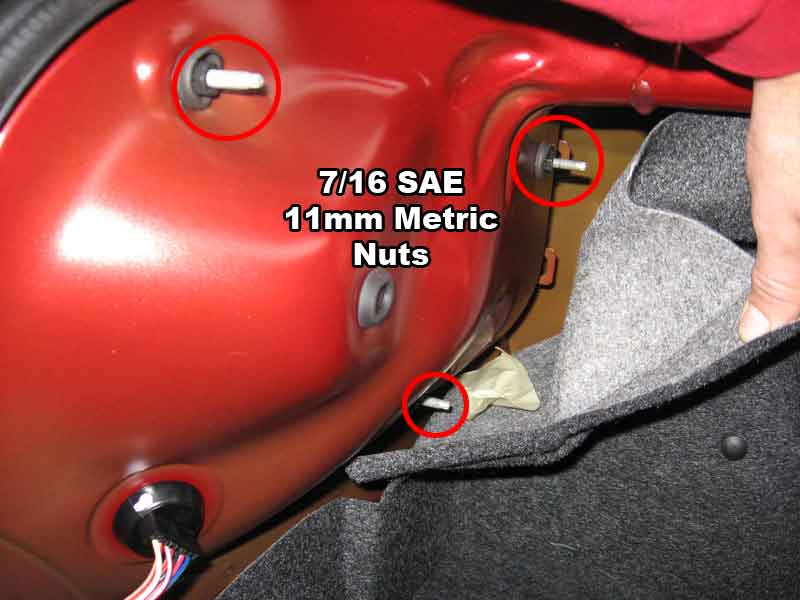
Unplug the taillight harness connector from inside the car. Remove the 3 nuts holding the tail light assemply on, then gently pull the assembly away from the car. Be sure to squeeze rubber grommet through hole so that it will come with assembly.
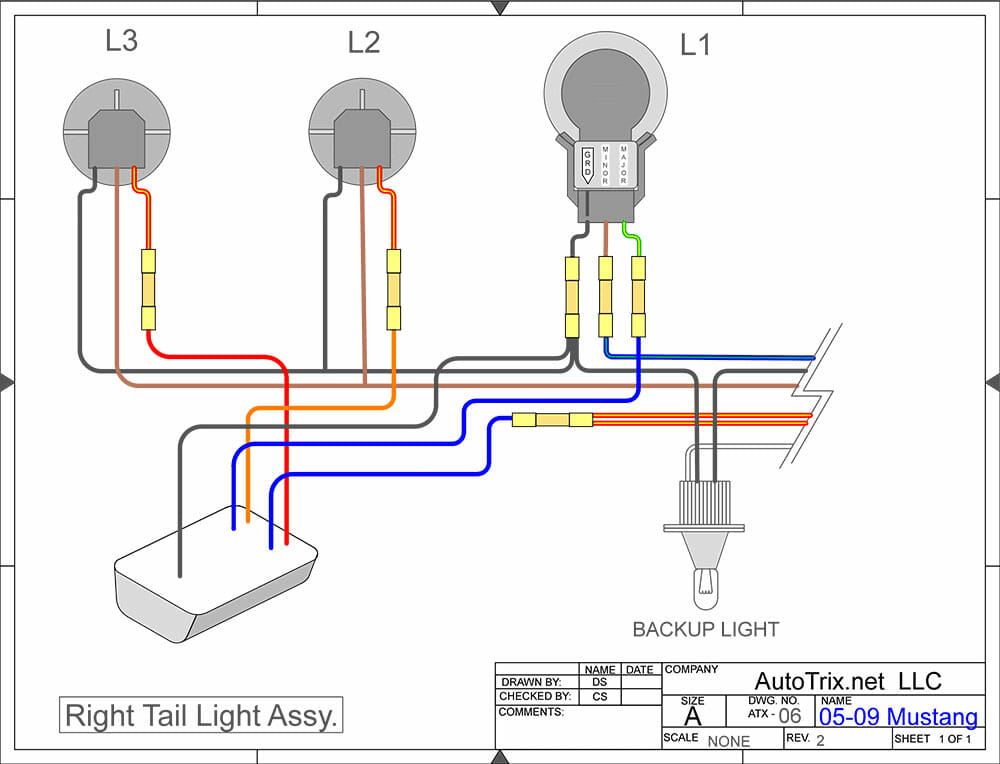
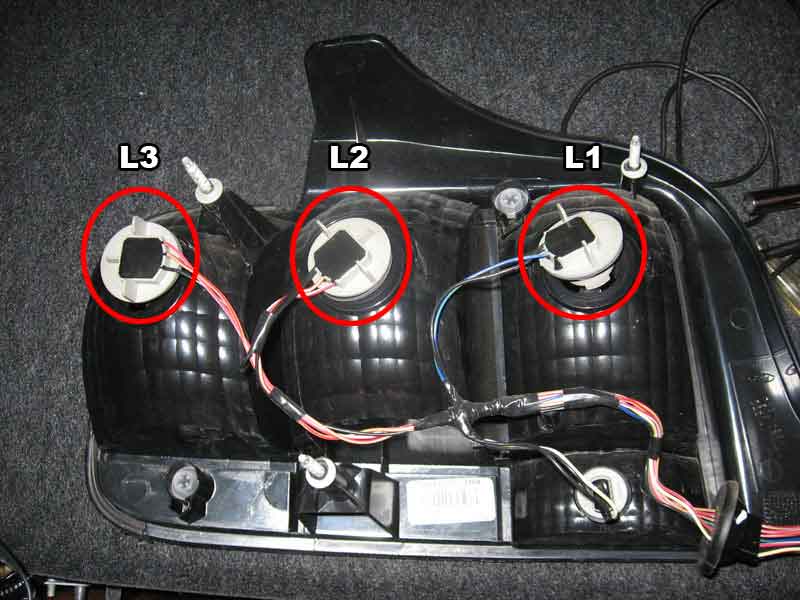
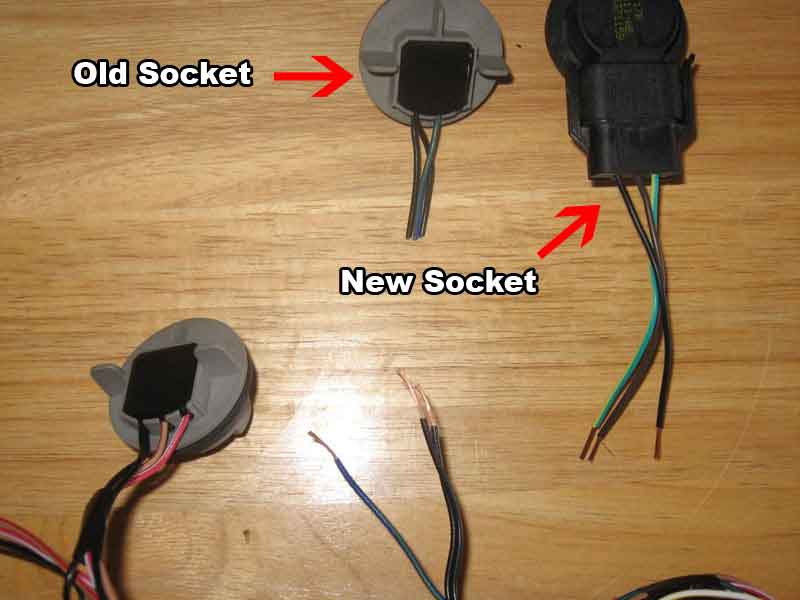
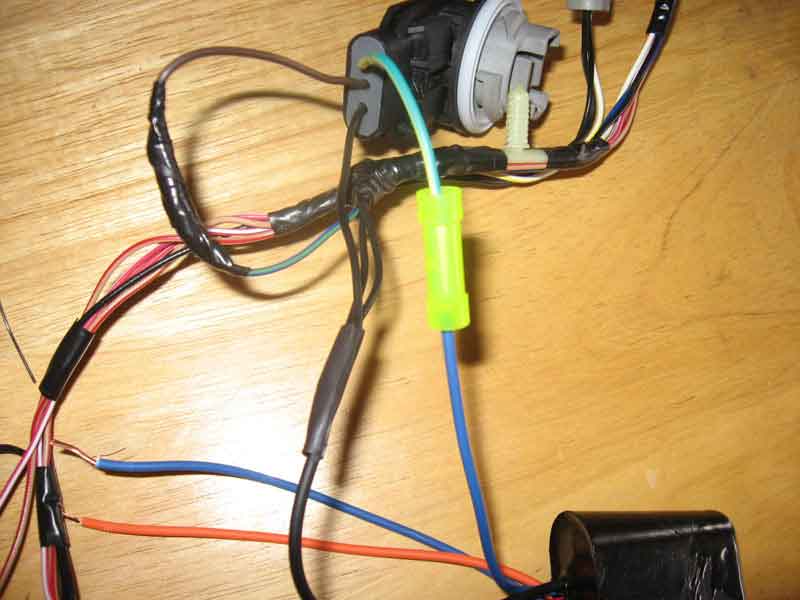
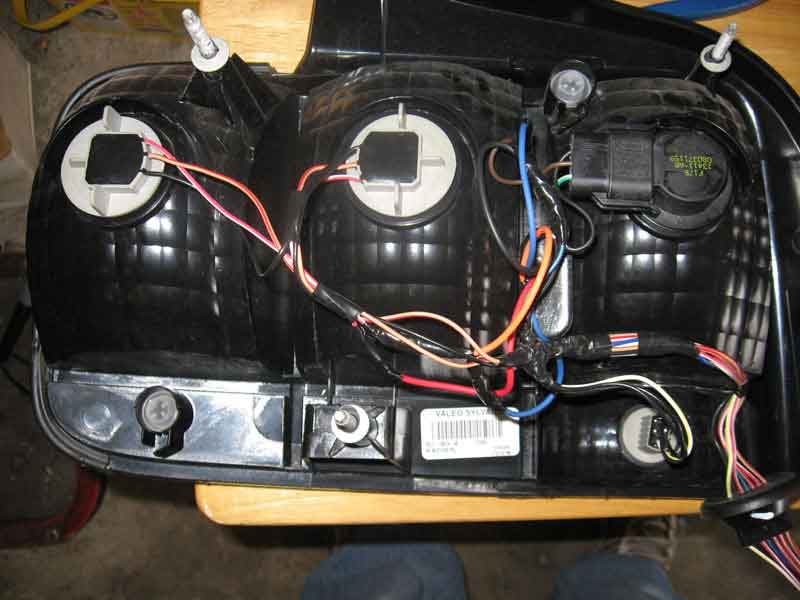
Notice we have the sockets labeled L1,L2 and L3. Remove the socket labeled L1, cut all three wires attached to it as close to the socket as you can. You are going to attach the supplied socket to the harness in place of this one.
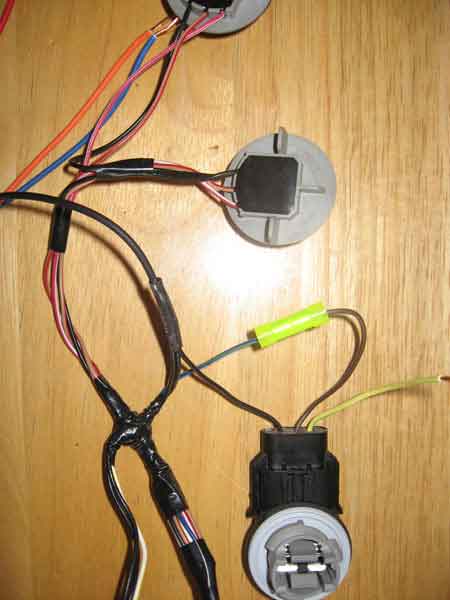
Attach the two black wires coming from the wiring harness that you just cut; the black wire coming from the new socket that is in the GRD cavity and the black wire coming from the tail light module all together.
Attach the brown wire coming from the new socket that is in the MINOR cavity to the green wire coming out of the wiring harness.
Attach one of the blue wires, does not matter which one, from the tail light module to the green with yellow strip wire coming from the new socket in the MAJOR cavity.
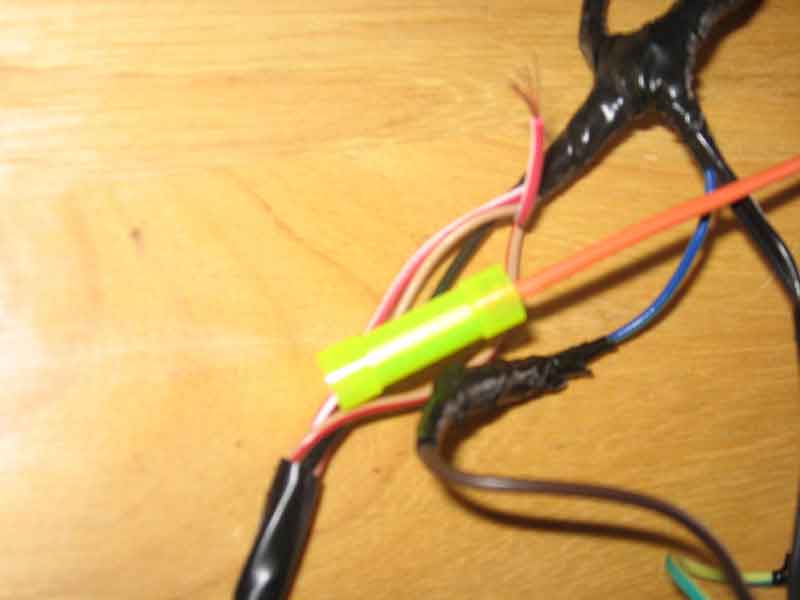
Cut the red/white wire attached to L2 socket. Attach the orange wire from the module to the wire still attached to L2.
Cut the red/white wire attached to the L3 socket. Attach the red wire from the module to the wire still attached to L3.
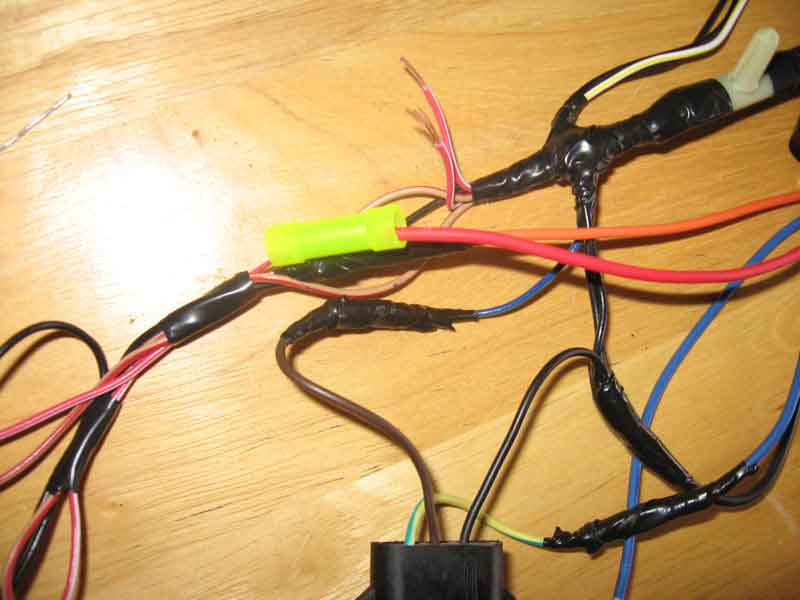
Attach the remaining blue wire from the module to the two red/white wires coming out of harness.
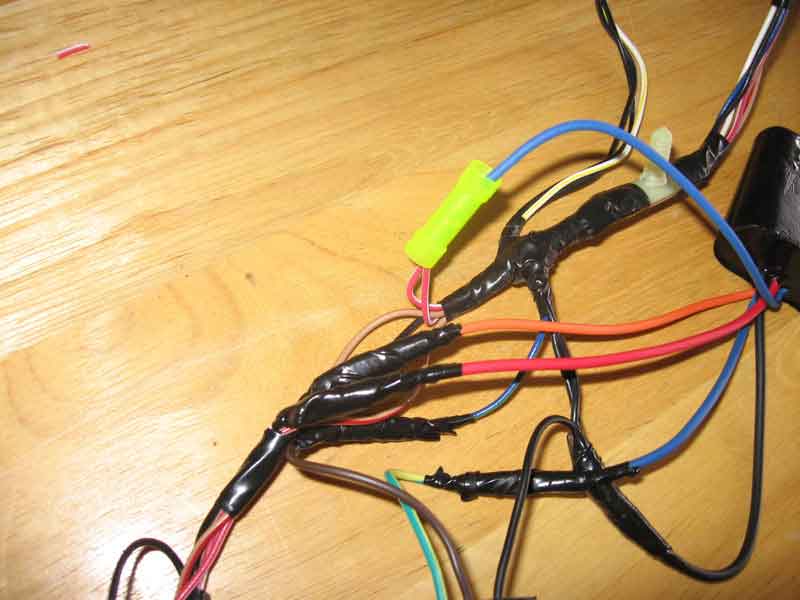
Re-connect any loose light sockets to lens and be sure to tape all connections very well. Module can be tucked into various positions behind the tail lens. Insert module inside housing gap.
Your drivers side module install is the same as what you have just accomplished, with one minor change. The light sockets are labeled the same: inside light L1, middle L2, outside light L3 and all the wiring connections remain the same.
**These modules require a solid 12V to operate correctly. Your car must be RUNNING for proper operation of the modules. Make sure to do your final testing with the car RUNNING** If you are having any trouble with your installation, please feel free to Contact Us. You may also find posts from people who have installed our kits on www.ls1.com helpful, along with community input on your issue.